

How To Remove Shimano 105 Cassette
![]()
You may need to remove your cassette, either to clean it or to replace it, and then refit it afterwards. We look at both Shimano and SRAM cassettes, fitting and removing cassettes from Shimano and SRAM XD freehub body. With the right tools, it's an easy job. Just follow our how-to videos below.
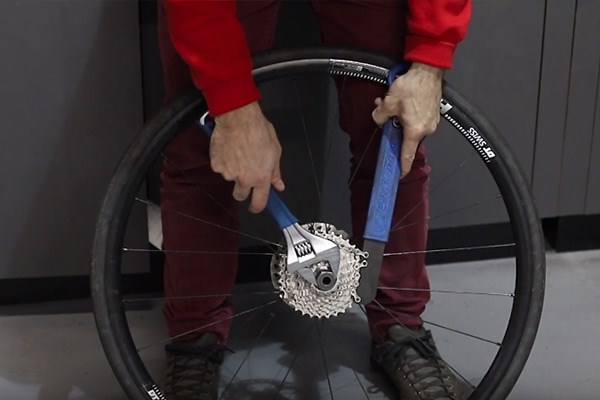
1
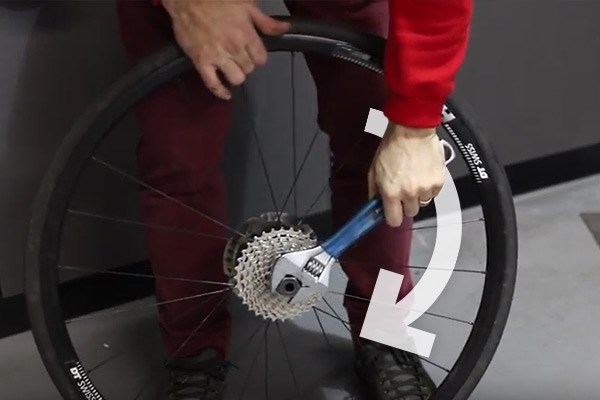
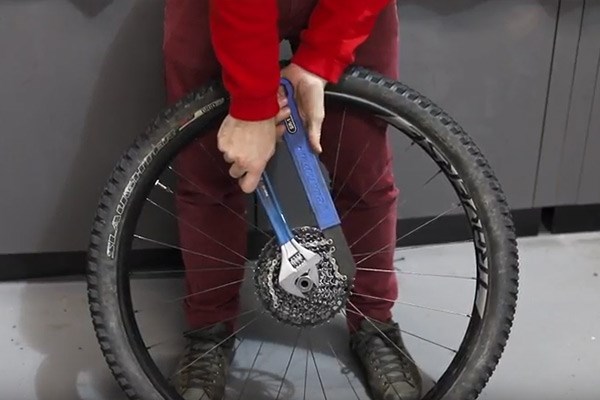
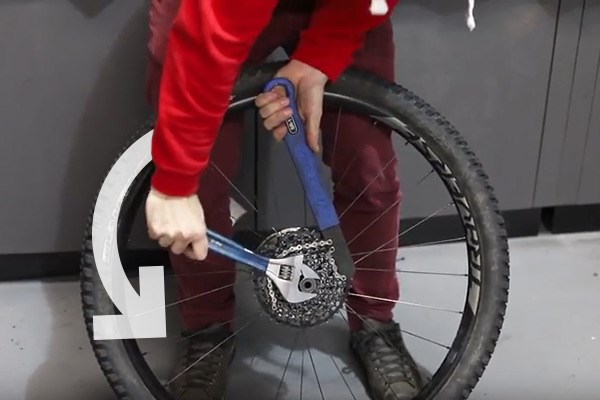
Prepare the cassettePlace the wheel upright on the floor so you can get full leverage when using the tools. Place the cassette tool into the cassette. Place the chain whip on the middle of the cassette with the handle to the left and the end of the chain wrapping from right to left. Make sure the extra links that are fixed onto the tool are firmly placed onto the cassette. Next, fit the adjustable spanner onto the cassette tool.
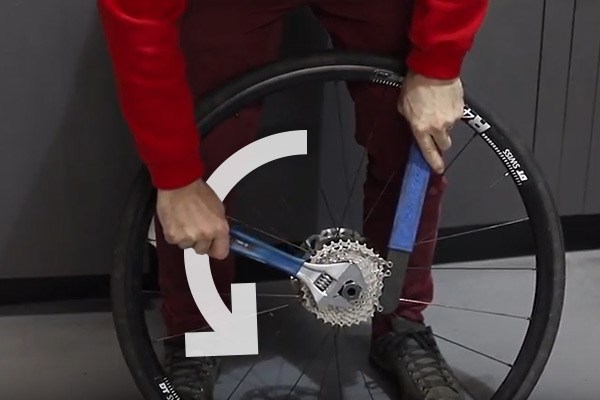
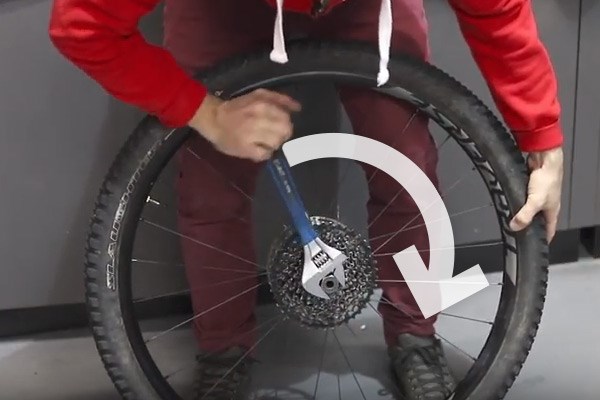
2
Loosen the lock ringMake sure that the chain whip and adjustable spanner are at about 45° from each other, this way you'll have plenty of leverage. Be mindful of your knuckles as you push down on both tools. This should loosen the cassette.
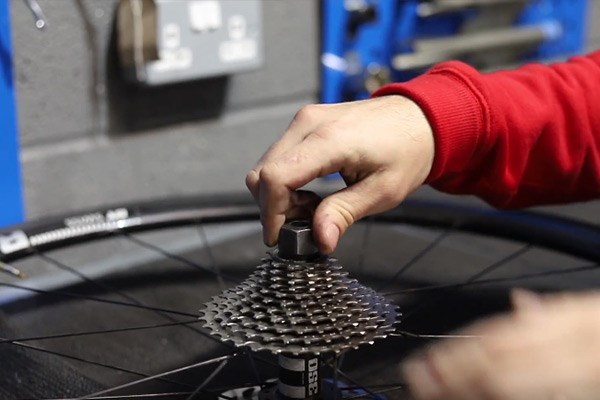
3
Remove the lock ringPlace the wheel onto a table or flat surface. By using your hand, rotate the cassette tool the last few turns to fully loosen the cassette. Remove the tool. Place your thumbs on the centre axle of the hub and grip it underneath, this will give extra grip on the cassette in case it is stiff from use. Pull the cassette off.
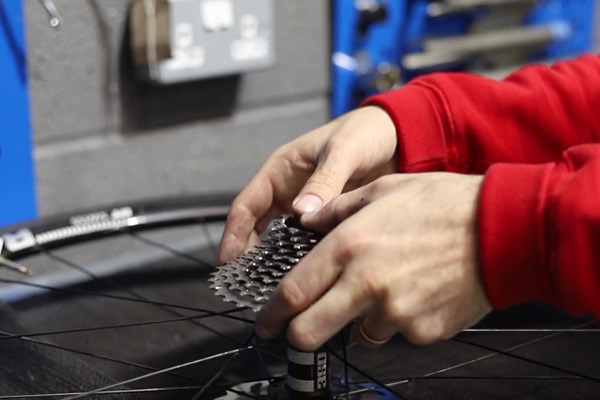
4
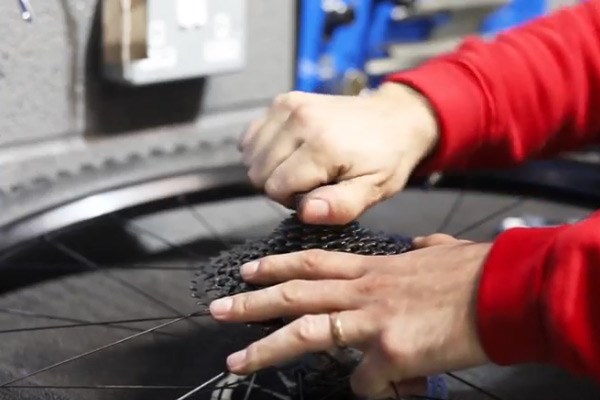
Take care when removingThe cassette will most likely be in multiple parts, and it's important to keep it in the correct order for easy installation later.
1
Align the cassetteYour cassette may come in a few pieces, and depending if you're refitting your old cassette or fitting a new one, you may need to find the correct order. Start with finding the small spline on the freehub body. You will match this to the small indent on the cassette and slide it onto the freehub body. (If your cassette is already in the right order and lined up correctly, slide the entire cassette onto the freehub body.)
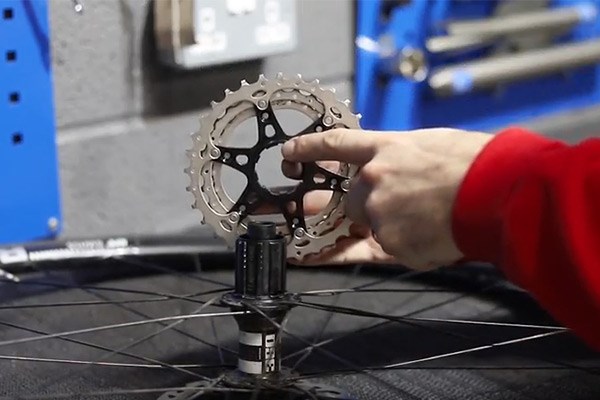
2
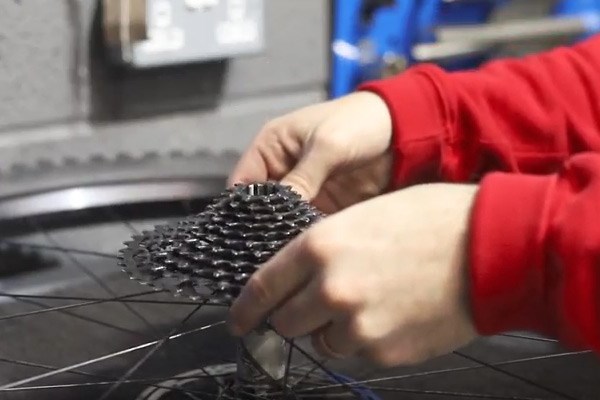
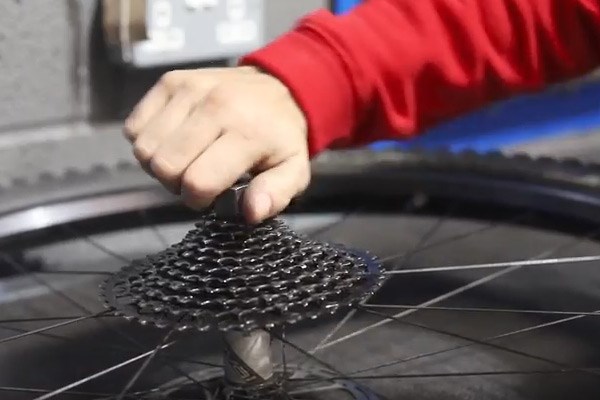
Place cogs onto freehubContinue to find each small indent on the cassette and slide these on after, from the largest to the smallest cogs. You'll be left with a few individual cogs with some spacers to fit between them. Once again, find the small indent and match it to the small spline and slide it on. Between each flat cog, place a spacer (which can be fitted in any way). The last two will not have spacers, as they are thicker than the others. To be sure that the cogs are the right way up, look for the little numbers that indicate their tooth size, and make sure these are upright.
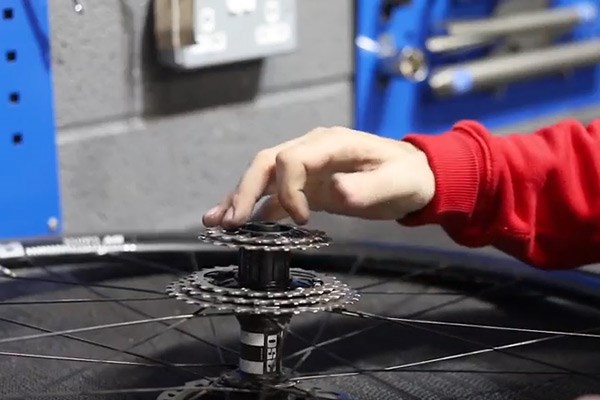
3
Secure the cassetteOnce all the cogs are on, you can install the lock ring. Put it on by hand first, making sure it is catching the threads correctly. When you cannot tighten it anymore, place the wheel upright on the floor to get more leverage. Fit the cassette too and adjustable spanner onto the cassette tool. Tighten the cassette fully. Check to see that the cogs are all aligned, and you're good to go.
1
Prepare the cassettePlace the wheel upright on the floor so you can get full leverage when using the tools. Place the cassette tool into the cassette. Place the chain whip on the middle of the cassette with the handle to the left and the end of the chain wrapping from right to left. Make sure the extra links that are fixed onto the tool are firmly placed onto the cassette. Next, fit the adjustable spanner onto the cassette tool.
2
Loosen the lock ringMake sure that the chain whip and adjustable spanner are at about 45° from each other, this way you'll have plenty of leverage. Be mindful of your knuckles as you push down on both tools. This should loosen the cassette.
3
Remove the lock ringPlace the wheel onto a table or flat surface. By using your hand, rotate the cassette tool the last few turns to full loosen the cassette. Remove the tool and remove the cassette. Now you're ready to clean or replace your cassette.
1
Place the cassette onto the freehubPlace your wheel on a flat surface, like a table. Add a touch of grease onto the threads of the freewheel. Place your cassette onto the XD Driver freehub, making sure it is sitting at the bottom.
2
Secure the cassetteTake your cassette tool and fit it into the top of the cassette. Rotate the cassette tool by hand, making sure the cassette is catching the threads cleanly. Once you can no longer turn the tool by hand, put the wheel on the floor to get greater leverage and use the adjustable spanner to firmly tighten the cassette.
3
Final checksDouble check to make sure your cassette it properly aligned and straight on the hub, and you're ready to go.
Recommended Products
Suggested Guides
How To Remove Shimano 105 Cassette
Source: https://www.tredz.co.uk/help-advice/product-help/how-to/maintenance/remove-and-fit-a-cassette
Posted by: duartecleat1949.blogspot.com
0 Response to "How To Remove Shimano 105 Cassette"
Post a Comment